- 4 Unexpected Things I’ve Learned From Buying My First Mobile Home Park
- How Ironic: America’s Rent-Controlled Cities Are Its Least Affordable
- U.S. homes are still a bargain on the international market
- Getting The Best Possible Quality Photos On MLSs and Syndicated Sites
- Home buyers in these markets have the upper hand
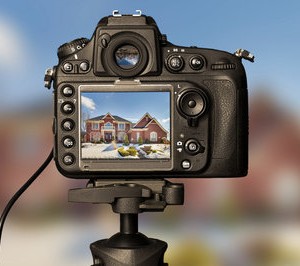
6 Tips for Better Real Estate Photos

When today’s home buyers are ready to go from online shopping to in-person viewing, we all know that listing photos can be the deciding factor.
Recent research revealed that a listing with between 10 and 15 photos has the best chance of generating leads. But they can’t be just any photos of course. To have the strongest impact, your listing photos have to be good.
Whether you’re hiring a professional or taking your shots yourself, here are 6 tips that will help you create better real estate photos for your listings:
1. Plan Your Shots
Before the camera starts clicking away, create a shot list to organize your shoot, gain efficiency and make sure you don’t miss important photos. No one likes scheduling a reshoot because they forgot to take a picture of the laundry room!
Start your list by writing down every room of the house, as well as including exterior shots of the front and back of the property. Then round out your list by including features you plan on emphasizing in the listing description. Be sure to print your list and bring it with you the day of (or give it to your photographer), so you can check things off as you go.
2. Don’t Be Scared to Move the Furniture
Often you’ll want to take a step back so you can get a better angle and show more of the room. But there’s a couch in the way! So what should you do? Move the couch. Agents and photographers often forget that furniture can be moved. You may not want to inconvenience the owner by moving their stuff, but we guarantee they won’t mind if it means getting a quicker or higher offer. Just be sure to put whatever you move back before you leave!
3. Check the Details
Stop! Don’t push that shutter-release button until you have given the room a thorough once over. Here are some commonly overlooked things to check for:
- Is the toilet lid up?
- Are the cabinets and drawers closed all the way?
- Is the TV and computer monitor off?
- Are pillows and blankets straightened?
- Can you remove any additional clutter from counters or table tops?
- Can you put away any seasonal items that might cause your photos to appear dated?
4. Avoid Shooting Blank Walls
Don’t laugh… this happens all the time. How many photos have you seen on the MLS of a blank wall, corner or floor? No matter what you are trying to show potential buyers, we guarantee you can find a more visually interesting way to do it.
5. Watch Out for Reflections
Vampires don’t have reflections. But REALTORS® do. While we’re happy not to have anything in common with those blood-sucking creatures of the night, having a reflection can be tricky when shooting listing photos.
Be careful to keep yourself from showing up in mirrors, windows or shiny appliances, or you might end up featured in a funny real estate photo like this!
6. … and Furry (or Human) Friends!
In some rare instances, a pet has helped sell a home. But more often than not, they do more harm than good. Don’t risk alienating potential buyers with allergies or aversions to pets. Keep Fluffy and Fido out of your listing photos.


 100% Secure
You must be logged in to post a comment Login